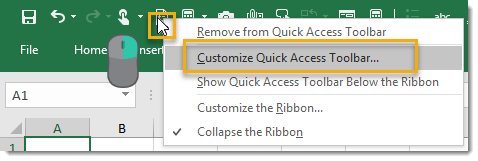
To Right Click anywhere in the QAT to quickly access the Customize Quick Access Toolbar menu. In the resulting window there is a Choose commands from drop down menu, you will be able to find all commands listed here by selecting All commands.
Excel Options
Look for the command called Options from the All commands menu. This command will allow you to quickly open the Excel Options window instead to going to File menu > Options. I find I use this menu so much that it’s worth having the shortcut. It will allow you to quickly adjust settings like what happens to the active cell when you press Enter, or changing the default number of sheet in a workbook.
Calculation Options
Look for the command called Calculation Options from the All commands menu. Do you sometimes work with large Excel files with lots of formula where it takes a long time to recalculate the workbook every time you make a change? If so, then adding the Calculation Options command into your QAT can be a big time saver. This command will allow you to toggle between Excel’s different calculation options. This means you can easily turn calculations to Manual while making changes to your spreadsheet and turn it back to Automatic when you’re done. This way Excel doesn’t recalculate after each change you make.
Camera Tool
Look for the command called Camera from the All commands menu. The camera is definitely a cool tool you should know about. It’s great for making dashboard, dynamic comments that change based on the contents of a cell or cells, or watching a range of values while making changes in another sheet. Simply select the cell or range you want to capture in a picture then press the camera button in the QAT. Your range selection will have animated dashes around it and the mouse cursor will look like a small plus sign. Now left click where you want to place the picture, drag the cursor and release. You can cut and paste this picture into another sheet or resize it as desired.
Send Workbook as Email Attachement
Look for the command called Email from the All commands menu. Do you ever make a quick Excel file and want to email it to a colleague? You have to save it first, then open your email, create a new email, then attach the file by navigating to where you just saved it in the attachment file picker. You can avoid all those steps now with this shortcut! Click the Email QAT button and a new Outlook email opens with the file attached, even if you haven’t saved the file yet. This is a big time saver.
Speak Cells
Look for the command called Speak Cells from the All commands menu. If you have a visual impairment then this command can be invaluable, otherwise it’s just a fun trick. Select a cell and press the Speak Cell button, Excel will start reading the contents of the cell and continue to read any other cells adjacent to the selected cell.
Find Circular References
Look for the command called Circular References from the All commands menu. Circular references in Excel are almost always a bad thing. This happens when the formula in a cell references itself either directly or indirectly through another cell. This command will allow you to quickly go to any circular references found in your workbook. You’ll then be able to fix the problem! This command only shows the first circular reference found in your workbook so you may need to use it more than once to fix all the problems. When the workbook contains no more circular references, the command will appear grayed out in the QAT.
Data Entry Form
Look for the command called Form… from the All commands menu. Did you know Excel has a built in data entry form? It can make the task of tedious data entry a bit more bearable. Select a cell in your data and press the Form command button. You can learn more about the form here!
Calculator
Look for the command called Custom from the All commands menu. Excel is basically a big calculator, but if for some reason want to quickly do a calculation outside of your worksheet, you can open up the Window’s calculator application from your QAT! Press the calculator command button and it’s ready to go.
A Separator to Keep Your Commands Organized
Look for the item called
Bullet Points and Numbering for Shapes
Look for the command called Bullets and Numbering from the All commands menu. Excel doesn’t have a bullet point or number list formatting option for data entry in cells, but there is such an option for the Text Box shape found under the Insert tab > Shapes > Text Box. The QAT command will appear grayed out unless editing a text box. This is the only place bullets and numbering can be used.
Strikethrough, Double Underline, Subscript and Superscript
Look for these commands from the All commands menu.
StrikethroughDouble UnderlineSubscriptSuperscript
Excel’s ribbon has a lot of formatting commands but there are quite a few that are missing. If you find you’re always using formatting commands only found in the Format Cells dialog box (Ctrl + 1), then these may be worth adding to your quick access toolbar.
Add a Macro
Select your Macro from the Macros menu. You can add a recorded macro to your quick access toolbar to easily run the code at any time. If you want to have access to the macro from any of your workbooks, you’ll have to save your macro to your Personal Macro Workbook. To do this, select Personal Macro Workbook from the Store macro in drop down list in the Record Macro dialog box. Now you’ll be able to run any Macro from the QAT in any of your workbooks.
Document Location
Look for the command called Document Location from the All commands menu. You can add this document location bar to the quick access toolbar to allow you to quickly copy and paste the full folder path and workbook name of the current active workbook. It can be pretty handy for quickly copying and pasting the location of a file to send to a colleague.
Select Only Visible Cells in a Range
Look for the command called Select Visible Cells from the All commands menu. When you copy a range that contains hidden rows or columns and then try to paste it somewhere, the entire range including the hidden rows and columns will be pasted. To avoid this and only paste the visible rows and columns we can use this select visible cells command. It will select only the visible cells in your selected range, then you can copy and paste to exclude the hidden cells. Note that if you’re working with hidden rows from a filtered set of data, then this command isn’t needed as only visible cells are copied when a filter is applied. There is also a little known keyboard shortcut for this if you prefer. Alt + ;